Sunday, November 27, 2011

My new hotel project

In the making..

For this hotel, I wanted to try tattooing the walls for real. I have choose skin tone for the base and designed all kinds of black and grey tone giant tattoo ( from indian Henna, Japanese style tattoo to Dayak tattoo ) for each room. I'm pretty excited with this project.It's really skill testing and the murals are massive, spreading across 2 walls.

This is my first mock up room.For this room, I did a Peacock Henna.

Smoothing the lines and adding details
It's 8 feet tall and about 10 feet in width

Monday, April 11, 2011

Corus Hotel, Ampang

My schedule was so packed when I did Corus hotel.When I finished everything only I realized I forgotten to take pictures. These are the only picture I have, which is kinda blur.

Corus hotel gave me a really cozy feeling. The hotel staff are all very well-trained. They had attended to my working needs at top speed.Come to think of it, I think working with Corus hotel has been my most comfortable one.

Besides the pictures you see here, I also did few more walls which is really long and huge.It was a curvy wall. Kinda tricky but it makes the mural appear more graceful.Like gliding along it. I think I'll go back there to take pictures one of these days.

Reflective Motifs. See how the window mirrors it?

The bedroom.

The lif area.
I only have these few pics. Will post up more when I get them.

Hotel Car Park Area

Painting hotel carpark is the hardest. It's hot. It's stuffy with all the carbon monoxide going on. I only did it becuase I already did the whole entire hotel from scratch, so finishing the carpark will be like a closing of a portfolio for me.

5 Elements Hotel is pretty unique. Each area of the hotel is theme into 5 sections- Metal,Wood, Water, Fire & Earth. The carpark area is located at Wood section. Many people thought that the Wood element means it's wooden things. Actually in Chinese culture, the Wood element stands for forest/plants/ flora.

So I did it with this greyish + little bit of greenish tone. My theme is "Wild grass in the breeze" Basically the grass are flowing with the car moving directions. Only those at the lif area I made them still looking.  I think I come out with this idea because the carpark is SO stuffy and hot! Gotto give it a little Airy Make-over :)  The best part about this mural is, if it's stain with those dark rainwater marks, you can just spray it with water or even scrub it with soap water and it's brand new! Super heavy duty-ly made. I would say.

The still part


This part is where the cars will be coming in from the right side. So I made the grass facing to the left side. It gives you a welcoming feeling when you drive down.

Wednesday, March 16, 2011

SOmething you can TRY~ :)

Simple Design for Small walls / corner.

1st Step :
You will need Masking Tapes (Tips : the cheapest, lowest quality ones are the best, coz the glue aren't that strong, it's be easier for peeling )

After you drew the lines on the wall with pencil and ruler, mask the area with masking tapes and try not to crumple them as you do, make sure the tapes are smooth.
( Tips : Don't put too much pressure on the tapes, if it's stick too tight, the base paint might come off as you peel. If the tape is crumpled, the paint will squeeze through those little gabs. That will be a mess! Do not mask exactly the pencil line, mask a bout 1 mm away from it, so as you paint, it will cover up those pencil lines )


2nd Step :
Prepare your paint and brushes.

Medium size Flat brush like this one is suitable for painting big masked area.
For smaller shapes, you can always use this type.
3rd Step :

Dip only 2/3 of your brush into the paint to avoid dripping. Then apply only 1 layer until the white space are covered. Do not reapply few layers at once, as it will soak through the masking tape and it'll be messy.After drying ( 1-2 hours ) Apply 2nd layer and it's done.

4th Step :

Wait for everythign to dry up ( 2 hours ). Carefully peel out the masking tape. One by one.Don't try to pull out few at once. And you are DONE!


Here are some really simple and nice designs that you can try.

Simple straight lines.
If your wall is small, try avoid putting too many lines.

Chess Blocks.
Try to arrange them to fit the space ( from ceiling to floor).
For this design, having them hanging half way, won't be too nice.

Big Dots.
You can cut one round cardboard from any round object in the house ( like water pail or even frying pan :D )and trace it repeatedly. The gab between the circles is important. Don't arrange them too close or too far.
Depends on the size of the circle. For this one, it's about 5 inches apart.

Strips.
This one is easy. But you have to measure everything perfectly.
Teeny Weeny yellow Polka Dots.
Cut a perfect round shape from a hard cardboard and trace it all over.
Arrange 1st row to be parallel and evenly seperate in a big gab. And then arrange the 2nd row of dots
parallel with the 1st row's gab. I hope you know what I mean. If you like, ofcoz u can try placing them randomly too.

Heavy to Light Cubes.
From big cubes on the left, slowly 'fading' to smaller cubes toward the right.
All these designs are suitable for small areas like apartments, studio house or condos. So have FUN! Remember to use Anti-Fungul and Washable paint if it's for your kitchen area.

DIY -How to Fix your wall

There are some very common wall problems such as Damp or Mould Growth on wall or efflorescent wall problem which seems to be a headache to fix. Actually it can be easily fix when you do it correctly.
Let me explain about efflorescent wall problem first. You know sometimes where you see little powdering and fluffy white deposit on the wall? That seems to spread out and look a little bit like salt? Well those are actually salt.It happens when the water content in the bricks (inside ur wall) evaporate due to the heat, it leaves the salt behind and it surfaces out on the wall.
As for the Dampen or Mould Growth problems are really common in Malaysia. Usually around the walls where the pipes are.I’m not gonna explain too much in case you feel too bored, my friends hate it when I talk about paint & wall. So to cut it short, it’s basically all the black, yellowish patches on the wall. Sometimes it even bubbles up and starts to peel after a while.
Some common wall problems. Yes it's really ugly, so pls fix it.

SO what you do to fix this is really really simple.
Step 1:
First you need to knock on the wall to listen. The affected area will give you a ‘hollow’ sound while the non affected ones are solid. Then you need to use a scraper to scrap out the affected area. You will notice, big chunks of the wall seems to fall out. That is because it’s ruined and the bricks/ cement has turn really sandy, you need to remove the sandy part totally.
Step 2 :
Then brush it clean with a dry brush. And apply KCC brand- Koresil 400. That is the best sealer I have tried among the rest. Wait till it dries up, it takes a day ( atleast 6 hours if you are in a hurry ). Well, it’s worth to wait, cause you are fixing a few years problem in few days.

Step 3 :
After that, apply cement on it to fill up the hollow area. Use a cement trowel to press really tight, onto the wall to make sure the cement are squeezing through all the little ‘stoney’ gab inside. Flatten the surface. Wait to dry. If it’s a sunny day, it take a day time, if it's evening already, u need to wait till the day after. This is to allow the water in the cement to evaporate entirely.
Step 4 :
If you like your walls to look like ‘Tofu’, you need to sand it. You can wrap a sand paper on a square/ flat wood to make the sanding easy and even. After that, apply 1 or 2 layers of Kcc Koresil 400. Wait to dry.
Step 5 :
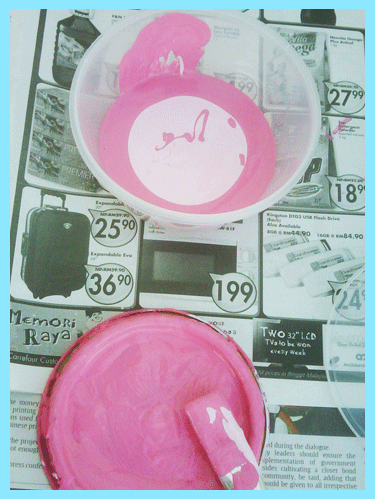
Paint your wall. I recommend any brand of Anti-fungal paint. Water-base paint are perfectly fine. Not necessary to use an oil-base, thinking that, “oh if I use oil and the water problem won’t be able to come back” that’s not true. That might even worsen the problem by locking the hydration inside.
If you do everything correctly, I'm pretty sure the problem won't come back. UNLESS, you have a broken pipe inside the wall that is like a water fountain thingy going on in there..then that's a different case. You need call ur plumber. :S

Saturday, March 12, 2011

Olive Green Newlywed's Room


I have designed a very simple and huge butterfly mural to go with Olive green base.
This is definitely my best choice of green. As the morning sun hits in, it gives the room a fresh glow.


Green is not a usual color that people would pick for their homes. Majority all-time favorite colors are usually white, light brown, pastel peach and most of the grey tones.  There are some Green-lovers who say : “I love green so much I want my room to be green all over” and end up choosing a shade that doesn’t go with anything else in the room. 

Here are some tips that might help:
If your room’s interior- Bed frame, side table and cupboard are mostly in Dark Brown, you can try these shades of Green. Let’s call them, Earthy.


If your interiors are mostly light Brown or Ochre, then you may try these shades of Olive/ Grass green.Sample as above.


If you like to decorate your room with colourful stuff, like bright pink paintings, yellow blankets and small little toy models. It will be pretty interesting to try these type of Lime/ Apple Green shades.


If I were to choose a green shade for a bed room, I would definitely go for Olive green with light color interiors. I want it to remind me of the big nature in a fresh & light way. Not too bright, not too dull. Just nice.

Tuesday, March 8, 2011

Elephant IN the House~

After attended an Indian wedding celebration yesterday (photos of the wedding link: http://canzng.blogspot.com/p/for-houses.html ), my love for Indian art history flows in like a rush. I am a big fan for old Indian hand carvings and paintings for a long time, but I only get to check them out through the internet, and since then I kept pictures of them. Here are some of the pictures that I been keeping.

Hand painted pillars in old Palace! Centuries ago.
Elephant carvings. Look at the details on the the giant gate!
It's CRAZY AMAZING for me! For my birthday if you ask me to choose between Old India photos
and a pile of cash, I would take the pics. ( and maybe the cash tomorrow as belated bday )


I am familiar with Chinese art and carvings, and I found that Indian wooden carvings and Chinese ones are very similar. Flora, fine and compact details.I love the elephants from Indian art and I also love the red of Chinese art.SO... I was thinking..Maybe..I can blend BOTH together to make an Elephant mural! Rich in culture and colors. OKeY..I'm trying out something different. Hope you like it. :)

Here's my Elephant Mural-One ~ Fusion

18 K Gold paint will be used as lining for the head decoration and highlights.

Elephant Mural- Two ~Indian Interior Home

Feature wall for Indian interior room
This one will be in fine red lines and subtle earth color.
Sequins lining ( means using red sequins to decorate the lining ) 
are optional.

Dear all, if you like these murals or something like this, let me know! Send me a picture of the wall you wanted to paint, I'll see what I can do for you. Cheers~

Sunday, March 6, 2011

Viaggio Italian Restaurant

Black and White Mural

Besides the wall, I designed the logo, menu and some of the promotional stuff.
It's all in black lines and angular black and white characters.
I like designing these black and white guys so much, I don't mind doing another 20 sets of them.

The finished mural with string curtains-


First, follow the rough sketch and draw guide lines on the wall.

Use a ruler if u must, gotto be neat!
Then, mask the pencil line with masking tape. ( tips: The cheapest, lowest quality masking tape is the BEST to use, so that it won't pull out the paint from the wall when you remove them )

Following the little sketch and enlarge them on the wall.
Be careful with the proportion, it must be exact.
Fill up masked area carefully. ( Tips: Apply one thin layer, wait for it to dry up completely before applying the 2nd coat. Because, if the masking tapes got too soggy , the paint will 'squeeze' out from the sides, and it'll be really messy when you remove the tapes )

The wall is really tall. See that wooden platform on the lowest part of the photo?
That my favorite thing, the workers made it for me to climb. I REALLY like it, it was much more convenient  than a ladder. If the size wasn't as long as a truck, I would have carried it home :)

Masking the saxophone guy and testing it under the spot light. We are going to put 2 hooks on the girl's hand, so when they fix the string curtain on it, we can use the hooks to hold up the curtain, it will look as if she is walking out from the wall. (O.O) it'll be cool!

The girl is right in the middle, so I've decided to put a little red color on her
to accent it.
After putting the red on her lips and flower on her hair, it looks not too plain, right?

Mum took this pic, she came to "disturb" me and found it funny that I look like a mess.
After about 20 hours ( in separate days ), it's done!

All the nine abstract characters.Phew~Done.
Guess which character I like the most? The Cellist! Although the cello strings drive me a little crazy.
If you want to see somemore of the final mural photos, check out.
http://canzng.blogspot.com/p/boutique-retail.html


Thank you for visiting! Have a nice day. :)

Saturday, March 5, 2011

百子图 Chinese 100 children mural

Received a special request one day.To paint a traditional 100 Children Painting on a long wall. 


百子图 ( Bai Zi Tu ) is one of the Traditional Chinese paintings that carries an auspicious meaning. It brings blessing of a complete, happy and healthy family that goes on for generations.


After researching the traditional 100 Children Painting from books and internet, I was stoned for a while. Staring at those pictures of a hundred kids piling up like little mountain!! Doing all sorts of stuff, playing with all sorts of game, makes me start taking long heavy breath. It's a headache drawing it on a rice paper, will it be a bigger headache drawing it on the wall? I wondered.


I was numb staring at a blank paper, thinking of a fresh composition as I don't want it to look like the usual. After 10 minutes of numbness, I came out with an idea, of painting the wall base in a rice paper shade (light brown) and then burn the walls partially to appear older with smoke-looking type of shades. Place in the 100 kid. As for their actions, I wanted to bring out all the olden time chinese children stories and games that I can remember. I want to make those people who has read olden children stories, will stand and stare and figure which is which. Something interesting, i thought. And so, I tried.


Here are some pictures I took with my phone's camera. However, my apologies for the poor photo quality. I finished the room at evening and it was really dark. The dimming lights in the room are not doing any good for me. It is a long wall at a narrow walk way, these are the best pictures I have. Check them out :)

I burned certain parts of the wall and tree bark to "aged" the wall and create a smoky tone.
See the red giant pot on the left corner? It's 司马光 story with the kids playing hide and seek.

The typical Red Bridge and fish lanterns. ( look closer : see the little girl who is about to walk up the bridge?
the little lantern on her hand? hehehe)
Tug of war 拔河比赛
Paper kites , Rattan Ball ( on far right corner )
Wooden baby toy wagon ( middle bottom)

A lazy kid from wolf story ( far left corner )
Chinese chess game ( upper left )
Peonies. This is another corner of the room.
Kid catching butterflies into rattan basket. (top right)
Picnic time-Sharing "Man Tou" under the little pavilion.(top right)
Eagle & Chick Game老鹰捉小鸡  (left)
This is a cute catching game where the Blue girl is the eagle and the green pants boy plays as a rooster
who is protecting his little chicks ( all the kids behind )
who will hold on to one another's waist forming a line.

Blind man catch thief game.
Where one kid is blind folded and has to follow the directions
given by the kid he carries on his shoulder to catch other kids who run around in
a circle drawn on the ground.( Bottom middle)
The game is from a chinese children story about a blind man and a cripple work together to catch a thief.

On the right is a story of the 3 brothers worked together to take down a kite which stuck on tree with the moral of
"Never blame each other when facing a problem, worked together is the only way to solve it"

This is the first time I did this type of mural, compact with a lot of things going on. For maintenance, due to a lot of color and shades being used, I try to minimize the chance of retouch-up. Therefore, I used the best anti-fungal paint that is also washable, meaning, if it's stained you can easily wipe off the stain with a damp cloth. If no one smash it with a hammer, this will lasted at least 10 years and above. :)

Tuesday, March 1, 2011

A CANDY project!

Brightland Kindergarten


I’m really lucky to have teamed up with Jade, the very young and beautiful owner of Brightland Kindergarten. What brought us together was, we both have one thing in common- we wanted to build (Jade)/design (me) a concept kindergarten! She is a highly qualified teacher and has a very unique way of teaching children, which is- Educated them while they are playing. I love the whole idea a lot and designing a concept for her Kindergarten was a dream comes true. As you have read in my blog earlier, you’ll know that, I never like typical kindergarten appearance and I ALWAYS wanted to design something BIG, SWEET and different!

After our rough discussion and sharing of ideas that day, we were thinking… what will best suit both genders and yet cute? What a kid can never had enough… CANDIES and LOLLIES!
I was very excited and can’t wait to do up the visuals. And what hits me was… The Wall’s Paddle Pop Rainbow Ice cream in my fridge! Immediately I knew what colours I wanted. Soft babyish pastel rainbow colours!


The ice cream that gave me the idea.

Candies IN THE MAKING
I'm using a great Outdoor paint, unlike mural paint that fades off, these guys are gonna lasted atleast 10 years, looking as brilliant.


Mixing my own colour.
SO sweet it's almost looked edible!

Lollie Swirl !

The Outcome


Day time

Night time. Still look really sweet at night.


The Final Overall view ( click to enlarge )


Candy Polka Dots on complete white walls! Doesn't it reminds you of a cake from Baskin Robbins? :)


Close ups views

The sides
Had fun doing these -A storey high Lollies.


Related Posts Plugin for WordPress, Blogger...